


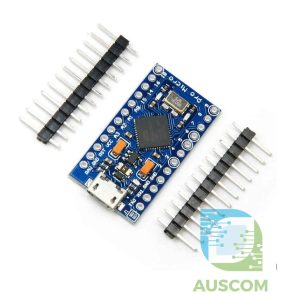
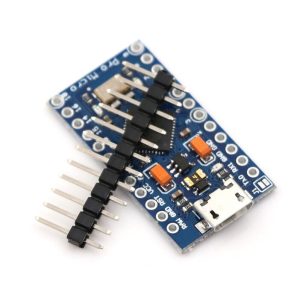
RP2040-Zero Raspberry Pi Microcontroller Board Dual-Core Cortex M0+ 2MB Flash 29GPIO

$8.20 Inc. GST
You save (%)
- Description
- Code Examples
- Additional information
- Reviews (0)
Description
🧠 RP2040-Zero Raspberry Pi Microcontroller Board – Dual-Core Cortex-M0+ | 2 MB Flash | 29 GPIO Pins
Overview
The RP2040-Zero is a compact, high-performance development board based on the official Raspberry Pi RP2040 dual-core Cortex-M0+ microcontroller.
Combining power, flexibility, and a tiny footprint, it’s perfect for IoT, robotics, automation, embedded control, and wearable projects.
With 29 GPIO pins, built-in communication peripherals, and full compatibility with Arduino IDE, MicroPython, and CircuitPython, the RP2040-Zero provides everything you need for efficient development and rapid prototyping — at an incredibly low cost.
⚙️ Key Features
-
💻 Processor: Raspberry Pi RP2040 dual-core ARM Cortex-M0+ running up to 133 MHz
-
💾 Memory: 264 KB SRAM + 2 MB on-board Flash storage
-
📌 GPIO: 29 multi-function pins supporting SPI, I²C, UART, ADC and PWM
-
🔗 USB 1.1 Host & Device support with Micro-USB connection
-
🧭 Built-in Peripherals: Temperature sensor, timers, and accurate clock
-
🔧 PIO (Programmable I/O): 8 state machines for custom protocol emulation
-
🌙 Low-Power Modes: Sleep and hibernate for battery-powered devices
-
📏 Ultra-compact design: ideal for robots, IoT nodes, and embedded systems
-
🧩 Software Support: Fully compatible with Arduino, MicroPython, and CircuitPython
📊 Technical Specifications
| Parameter | Description |
|---|---|
| Microcontroller | Raspberry Pi RP2040 (dual-core Cortex-M0+) |
| Clock Speed | Up to 133 MHz |
| Memory | 264 KB SRAM + 2 MB Flash |
| GPIO Pins | 29 multi-function I/O |
| Interfaces | SPI, I²C, UART |
| ADC | 3 × 12-bit inputs |
| PWM Channels | 16 |
| PIO Units | 8 state machines |
| USB Support | USB 1.1 Host & Device |
| Operating Voltage | 3.3 V logic |
| Power Input | 5 V via Micro-USB |
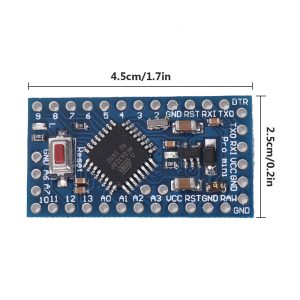
| Dimensions | ~22 × 18 mm (tiny form factor) |
| Weight | ~3 g |
🧩 Applications
✅ IoT devices and wireless sensor nodes
✅ Smart home automation projects
✅ DIY robotics and motor control
✅ Embedded system design and prototyping
✅ Wearable electronics and portable gadgets
✅ STEM education and maker learning kits
📦 Package Includes
-
1 × RP2040-Zero Microcontroller Development Board
📌 Code Examples – RP2040 Zero (Dual-Core Cortex-M0+, 2MB Flash)
📋 Overview
The RP2040 Zero is a compact Raspberry Pi RP2040-based microcontroller board with:
✔ Dual-Core Cortex-M0+
✔ Up to 2 MB Flash
✔ ~29 GPIOs
✔ Support for Arduino, MicroPython, and C/C++ SDK
This section includes basic examples showing:
-
GPIO (digital in/out)
-
PWM (LED brightness / servo control)
-
ADC (analog sensors)
-
I²C interfacing
🟢 MicroPython Getting Started
1) Install MicroPython Firmware
-
Hold BOOTSEL and connect the board via USB
-
Release BOOTSEL when a USB drive appears
-
Drag & drop the official MicroPython UF2 file onto the board
Open Thonny IDE and choose MicroPython (RP2040) as the interpreter.
🔌 MicroPython – Blink LED
This toggles the onboard LED (GPIO25) every 500 ms.
📊 MicroPython – PWM Control (LED Brightness)
This code smoothly fades the LED up and down.
📈 MicroPython – ADC Read (Analog Sensors)
This reads an analog sensor and prints the voltage.
🎛 MicroPython – I²C Scan
Useful for verifying I²C sensor connections.
🔵 Arduino Getting Started
Arduino IDE Setup
-
Open Arduino IDE 2.x
-
Go to Boards Manager
-
Install Raspberry Pi RP2040 Boards
-
Select RP2040 Zero (or generic Pico RP2040)
-
Choose Upload Method as USB
🔌 Arduino – Blink LED
⚙️ Arduino – PWM (LED or Servo)
This fades the LED up and down using PWM.
📈 Arduino – ADC Read
🔌 Arduino – I²C Scan
This discovers I²C devices connected to the board.
🧠 Notes & Tips
✔ RP2040 Zero’s GPIO numbering corresponds to the physical pins — be sure to double-check your board’s pinout
✔ Analog pins typically read 12-bit values (0–4095) in Arduino
✔ For Servo motors, use PWM with appropriate frequency and an external power supply
✔ For I²C sensors, enable Wire.begin() before scanning or communicating
✔ RP2040 supports dual cores — for advanced users you can run tasks on both cores with appropriate SDKs
Additional information
| Weight | 40 g |
|---|---|
| Dimensions | 260 × 160 × 20 mm |
Only logged in customers who have purchased this product may leave a review.









Reviews
There are no reviews yet.